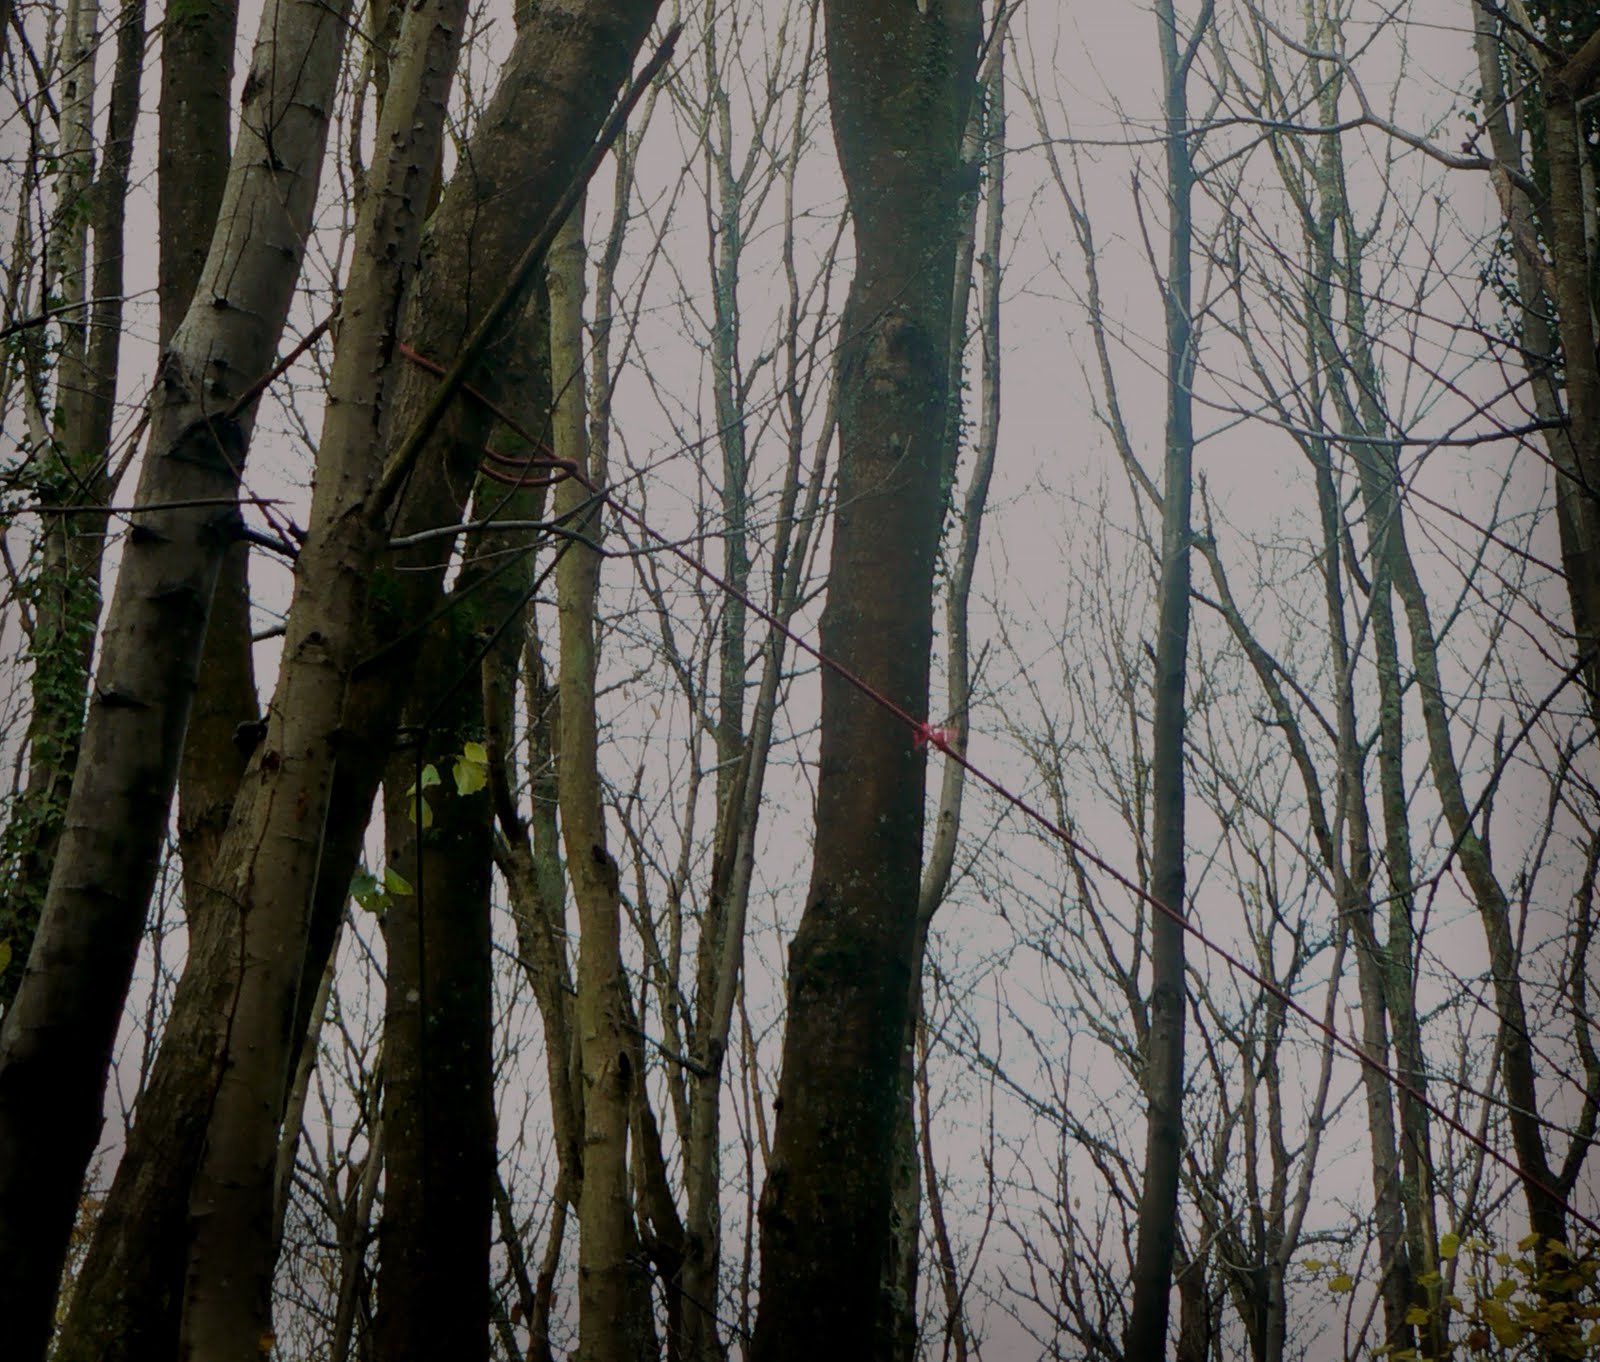
Today I was upon the hills with my dog, Bracken, and to my despair I saw that the logging has advanced.
There is far too much of it occuring at once here and the effect upon nature and species populations will be catastrophic. Forced into smaller and smaller habitats disease will quickly spread and competition for food, breeding and space will be heightened causing more loss of populations and even some species of flora and fuana to the area. I have allready seen it happen, Golden Eagles, Badger, Red Squirrel, Pine Marten and Wild Cat chased from the hillsides. It is not just species that we are losing but something deeper as well....
We all have our forms of escapism from reading, movies and games to drugs, alcohol and sex, even sleep and dreaming provides us with escape.
But escapism in nature, in the land offers us something different, unique and all together truly far more healing.
Many of the other forms of escapism act as distraction allowing us to indulge and the potential to ignore other aspects of ourselves, situations and things we do not like therefor we can use these forms of escapism to run away.
How many things are solved by running from them?
Nature however offers us solitude and a non-threatening wat to face the silence and self, a gentle way that gives us the time and space to face ourselves and our problems, to work things out with no pressure, to understand and therefor truly heal.
Yet this is what we are destroying?
The harmony of natural land? Why?
I have not read this from some hippy book or repeating the words of another instead what i am writing comes from my own experiences, my own understanding gained from moments in the wild.
I merely want to share it with you.
Many may say it is a nice idea, the thought of wild places, nature and harmony but it can not work like that, they would say that what we are doing can not change.
But what if it could? What if a happy medium could be found? Are there alternatives to at least change some things?
Yes for thousands of years mankind has to some degree managed the land surrounding us but when does this become overkill? There is a balance that has been off for some time.
At some point the government took the wild places for themselves, places that should belong to nobody or to all, and these were given to the forestry commision who decided it would be in our best interests to plant them with fast-growing, non-native timber tree crops which could then be sold. Why not? No people were using them at the time....
This wood is sold to other placs and well you can see the cycle that develops without me pointing it out.
Such a shame for a area that is reputed to be underpopulated with which you would associate wild places. Dumfries and Galloway is recorded as the most underpopulated county in mainland UK, this may have made bussiness tricky so many farmed or forested or left.
Times however change!
Recently there has been talk of Carlisle Airport opening to the public and major flying destinations meaning a variety of things two things in particular.
There will be a surge of people moving to the area to live and commuting to the likes of London forwork and business. House prices will go up and a variety of bussiness will be more viable in the area and though i do not personally wich to see more people in my land this could be the opportunity to help save it. Political obsession with money could mean that having unappealing scarred countryside covered in timber machinery that can not even be walked through may put people off moving here that dream of moving to countryside.
More importyantly however is tourism.
Tourism to the area will potentially become a larger industry providing funds and we must ask ourselves why people would come here? Certainly not for the nightlife! No. People come here for an ideal of what Scotland is, for the wild and rugged land that is rife with history, stories and nature.
If we live up to that ideal by protecting our nature, our wild places and encouraging knowledge of our history, and we certainly have huge potential here, then the industry can benefit all financially, culturally, in awareness and naturally. Allowing us our income and our "wild" lands.
I have many ideas of how to deal with the land itself but simplified why can we not replant these felled hillsides with our native conifers the Scots Pine? Fast growing and indigenous but also able to withstand the acidity of the soil created by the non natve conifers biodiversity within the area would thrive encouraging the idea of the wild land and less clear felling may not be required on such a grand scale and instead represent more the areas that would have traditionally been cleared by large grazers.
Why can't farm land, most of which is grazing land, be open wood pasture? Spacing out native trees over the fields so animals may graze amidst them will only enrich them, the leaves from the trees providing nutrients to the soil, grass and therefor animals. For these large areas and farms the owner would hold the logging rights to these trees which in turn would increase the value of land.
I ask you why cant we make a difference? Maybe one voice will be shot down in flames by the officials but a shout from a united population can't be ignored! We tell the government, the officials what WE wish for OUR land and they are meant to represent that utilitarian wish. We give them the means and they are meant to get it done! We advise them! They do NOT command us and if enough are united they can not!
And if we were to start this political, environmental fight of inspiration and change then the priode and passion of the fight would not just be mine but instead it would belong to everyone, to you. Even if the fight failed the pride, passion, purpose and undesrtanding would still be yours, the tools to handle anything in life.
When accomplished the sense of achievment would not be mine but that of all those who took action whatever that action be big or small. I can promise you that having fought for something bigger than oneself is selfless and the sense of accomplichment, of having been a part of that is quite simply astounding.
That action can even just be a word, a click or merely a mindset of being open to this idea of change.
I am fortunate that I feel a sense of purpose on all this and all i wish to do is help, to help the land heal, to help people help themselves. I just wish to share with you.
You may laugh, you may abuse, you may get angry or be indiferent but my intentions are good and my words are as honest and passionate as can truly be spoken.
I want to make a difference....
and I would like you to share in that.
Thursday, 22 July 2010
Tuesday, 29 June 2010
Photoshop Fun
I recently acquired the opportunity to have a go of a newer and fuller version of photoshop. This is what i managed to create.


Original photo taken by and copyrighted to : Tom Langley

My musical manipulation using photoshop, not bad for a first attempt I am told.
Monday, 28 June 2010
My First Ever Bow
As part of my bushcraft Instructor course I had to make a bow of a decent quality. Having never made one before this was somewhat of a challenge (especially since my finger got cut off half way through the project) and the stave itself gave me all manner of problems but I endured and the bow evolved. I think i will stain it and do some more work on it for aesthetics....

In order to make a bow, a stave to do so must first be acquired from which to make one. A stave may be obtained from the trunk of a large tree and sometimes from some large, thick branches (Yew bows are generally made from the branches of the tree) but before we cut down any tree there are certain factors that must be taken into consideration.
The first consideration is what species of tree the bow is going to be made from and in theory all tree species COULD be used but there are certain species more suited such as Ash Fraxinus excelsior , Rowan Sorbus aucuparia , Yew Taxus baccata , Cherry Prunus avium or indeed any wild fruit/ nut tree species and some that are not so brilliant such as lime and chestnut.
For this bow I used the species Ash Fraxinus excelsior as its straight grain makes it easier to split in making the stave and easier to tiller in the later stages but also has a certain amount of strength and also elasticity, it is also easy to work green.
When locating a tree suitable to take staves from for making a bow the tree should grow straight, with few knots or low branches and will ideally have large rings (particularly in broadleaf species) and the diameter should really be a minimum of 8 inches however the tree which we used was closer to 15 inches in diameter.
The tree was then felled safely as shown below.
The direction in which the tree is likely to fall must first be determined and then an escape route should the tree react unexpectedly, if an escape rote is not possible a different tree must be used.
The undercut, the first cut, is then made. For this cut the bottom part must be flat and the upper area at about 45 degrees and goes through roughly the diameter of the tree but this is dependant upon several other factors such as the lean of the tree and so on.
 Felling a large ash in preparation for making bow strings
The back cut is then made to the other side of the trunk slightly higher up (a couple of finger widths in this case) leaving a couple of inches width so that some control may remain over the tree. The tree is then pulled down with the safety rope and the stump smoothed off.

Once the tree had been felled then the staves could be created fairly simply as follows.
For speed the trunk of the tree after being felled with an axe was split into 6-8ft sections using a chainsaw though this may be done with a band saw.
An axe was then ran along the length of the logs to create a line in which to follow.

Following this the axe was then battered in deeper along the line and at the end of the log as shown in the picture splitting the logs slightly.


Where the logs split a “glut” was then placed and battered in increasing and deepening the split along the log until eventual the log is cleft in two.


The process was then repeated again to quarter the log and in some cases yet one more time to give 8ths where there was a large enough area to do so.
The staves are now available and ready for the next stage

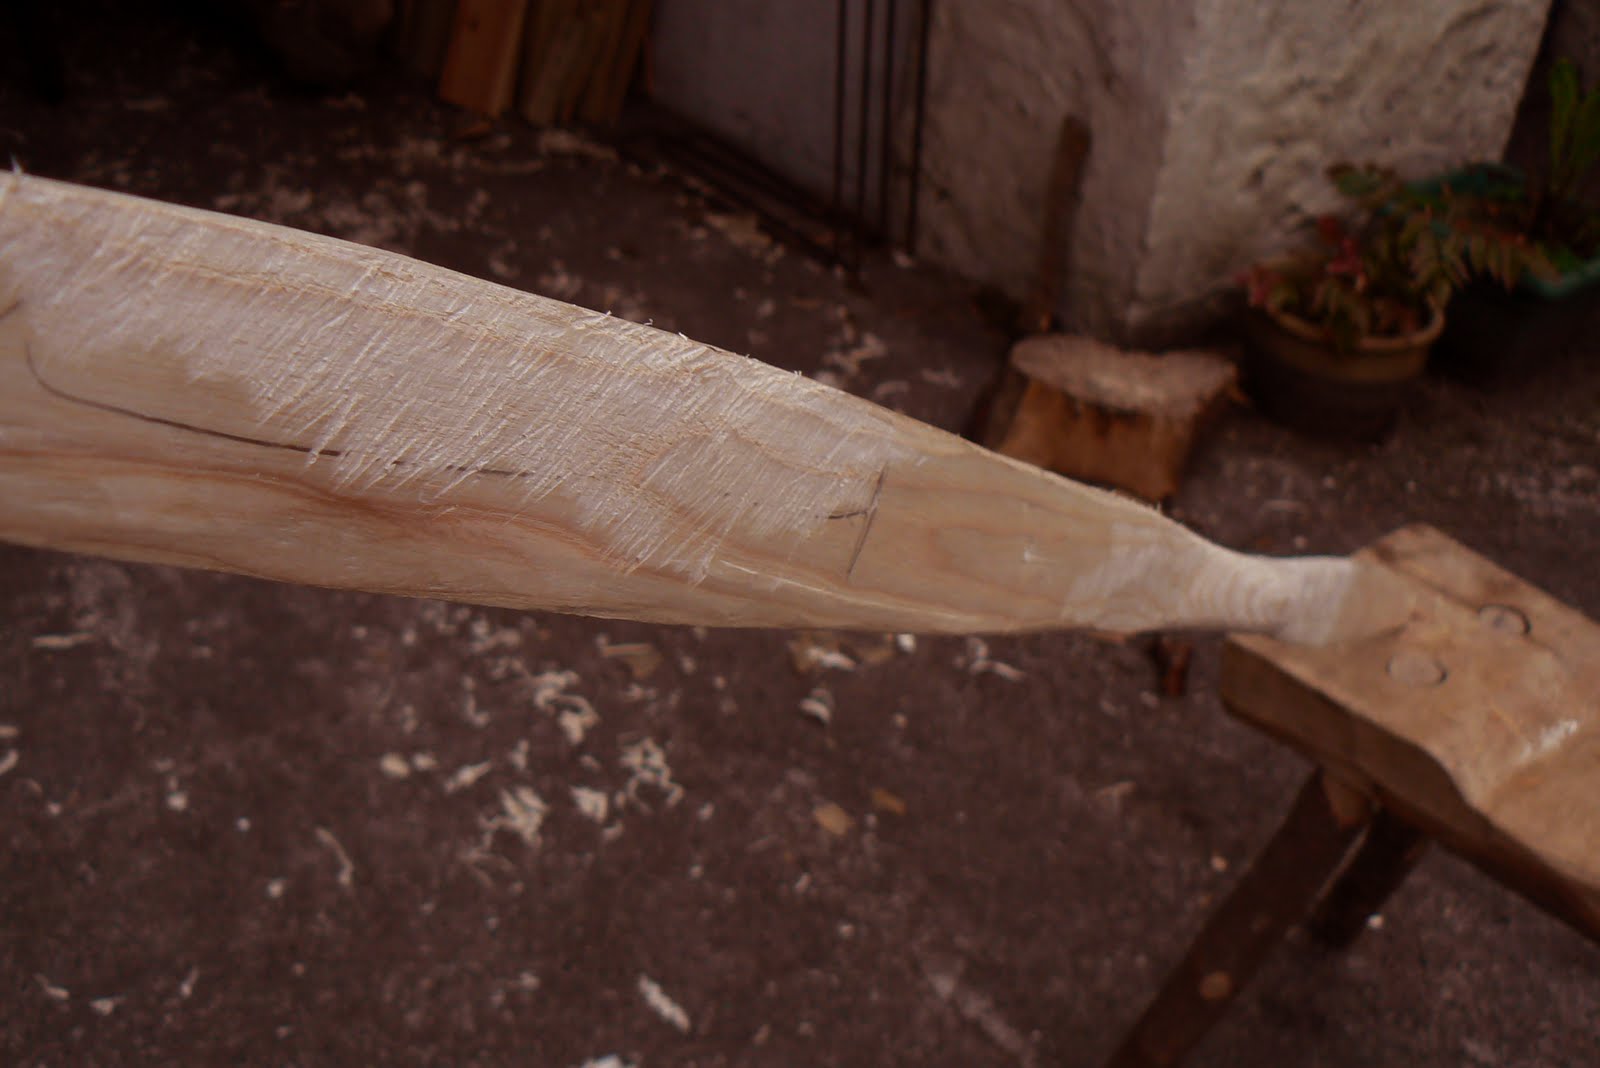
The next stage is to start creating and shaping the basic bow dimensions and cutting away excess wood. First it is wise to take a good look at the bow and decide which type of bow style it may wish to be or is most suitable to. There are hundreds of different bow styles out there but I decided I was going to base my bow on the ancient Mere heath design however this was changed later on.
The dimensions for a Mere Heath bow are as follows.

The design was the marked out, the front of the bow being the outer ring of wood and outer edge of the stave and following this excess removed as follows.

To remove excess wood stop cuts were put in place using a folding saw and then knocked out using a knife and baton technique.


The side edges of the bow were then shaped and more excess wood removed with an axe and a knife to create the basic mere heath shape.

At this point however a crack had appeared in the edge of the bow and the bow was then altered to resemble more a holmeguard. Unfortunately after journeying, arriving home and floor tillering the bow to warm it off an end of the bow snapped off. Not having much luck with the Mere Heath or holmeguard style I then adopted a variation and a style more my own. I made a shorter bow that resembles a mere heath in miniature somewhat. The power behind the bow would not be so great for making the arrow travel long distances but would still have some power in it. I decided to keep going with this bow and the result would resemble an old stalking bow (bows that were used in stalking would not require as much ability to make the arrow travel far as the stalker would get within 30ft of the intended target)
The bow was therefore reshaped using a spoke shave to make this smaller styled bow once the bow began to bend it was then time to tiller.
Nocks were then put in so that string may be attached to the bow for tillering and as bow string later on


Tillering is an extremely important stage in making a bow it is really this stage that turns a piece of wood into a working bow and it is a stage in which much care must be taken.
I used a tillering jig to tiller my bow that are quite simple to make and this one attaches to a shaving horse.
First it is important to make sure that the bow is bending evenly on both limbs, if the bow is not bending evenly then parts will be weaker than other and this may cause a break or a twist and a number of problems. To make sure the bow is bending evenly it is attached to the tiller and lightly pulled so that it may be visible the areas not bending, these areas are then worked on lightly with either a cabinet scraper or a wood rasp as I used, care must be taken not to over work these areas or a hinge may occur. The thickness of the bow should be roughly even throughout.

Once the bow is bending evenly it is then time to tiller to the desired draw length and weight. Due to the shortness of my bow the draw length was only going to be about 26 inches maximum and we managed to get the draw weight to 36 pounds. To do this the bow is lightly worked on until it may be pulled to the desired poundage/ length, tillering also allows the bow to get used to being pulled and should always be done gently at first to warm it up.

Once the limbs are bending equally and enough wood is taken away to get the desired draw length then essentially the bow is done and ready to be finished and fitted with a string.
Part 4. Finishing the Bow
Now that the bow has been shaped as desired and the draw length as desired all that remains to be done is sand the bow to a nice smooth finish, oil it if desired (I recommend Danish oil) and fir the string the shoot.
To make a string I recommend using Dacron and it is made much in the same way as making cordage and is created as follows in the image.
I made the bowstring using the Flemish string technique and the bottom loop tied using the timber hitch. A Flemish bowstring is made of separate strands cut to length and made into two or more plies and the top loop is made by placing in the end of the plies with the main body of the strings using a rope twist method.
The general rule of thumb is that the amount of string used should be about 3 to 4 times the length of your bow. Once you have the right amount of string, the strings should be waxed so that they don’t unravel.
To form the top loop twist the strand clockwise and then cross it anticlockwise over the other and repeat until a corded length is created long enough to form the loop. Wax the loop as well. Lay in the strings so that the ends are slightly stronger.
To make the second string follow this technique except this time it can be trickier as the ends are broken but the technique applies, the ends are laid in to make it stronger and the strings are waxed. The knot that is then used is the timber hitch “bowyers hitch”
Serving string is then wrapped around the area in which the arrow will rest and the string pulled to protect it from wear and tear.
The string should be waxed regularly.

BOW MAKING

Part 1: Obtaining The Bow Stave
In order to make a bow, a stave to do so must first be acquired from which to make one. A stave may be obtained from the trunk of a large tree and sometimes from some large, thick branches (Yew bows are generally made from the branches of the tree) but before we cut down any tree there are certain factors that must be taken into consideration.
The first consideration is what species of tree the bow is going to be made from and in theory all tree species COULD be used but there are certain species more suited such as Ash Fraxinus excelsior , Rowan Sorbus aucuparia , Yew Taxus baccata , Cherry Prunus avium or indeed any wild fruit/ nut tree species and some that are not so brilliant such as lime and chestnut.
For this bow I used the species Ash Fraxinus excelsior as its straight grain makes it easier to split in making the stave and easier to tiller in the later stages but also has a certain amount of strength and also elasticity, it is also easy to work green.
When locating a tree suitable to take staves from for making a bow the tree should grow straight, with few knots or low branches and will ideally have large rings (particularly in broadleaf species) and the diameter should really be a minimum of 8 inches however the tree which we used was closer to 15 inches in diameter.
The tree was then felled safely as shown below.
The direction in which the tree is likely to fall must first be determined and then an escape route should the tree react unexpectedly, if an escape rote is not possible a different tree must be used.
The undercut, the first cut, is then made. For this cut the bottom part must be flat and the upper area at about 45 degrees and goes through roughly the diameter of the tree but this is dependant upon several other factors such as the lean of the tree and so on.

The back cut is then made to the other side of the trunk slightly higher up (a couple of finger widths in this case) leaving a couple of inches width so that some control may remain over the tree. The tree is then pulled down with the safety rope and the stump smoothed off.
A safety rope was put in place as a guideline and to help the tree fall in the right direction
Once the tree had been felled then the staves could be created fairly simply as follows.
For speed the trunk of the tree after being felled with an axe was split into 6-8ft sections using a chainsaw though this may be done with a band saw.
An axe was then ran along the length of the logs to create a line in which to follow.

An axe drawn across the ash log as a guide for making staves
Following this the axe was then battered in deeper along the line and at the end of the log as shown in the picture splitting the logs slightly.

Stephen and Sean demonstrate beating the axe into the log to split it

Log starting to split showing “gluts”
Where the logs split a “glut” was then placed and battered in increasing and deepening the split along the log until eventual the log is cleft in two.

Gluts used in splitting wood


The axe is lightly ran through the split log

A log split into two staves
The process was then repeated again to quarter the log and in some cases yet one more time to give 8ths where there was a large enough area to do so.
The staves are now available and ready for the next stage
Part 2: Preparing the Bow Stave
The next stage is to prepare the bow stave to make it ready for shaping the basic bow dimensions.
First the outer bark must be removed and this is a stage in which time and care should be taken, as it is the outer ring of wood that gives the bow its strength and any cuts into this outer ring of wood will result in a serious weakness of the bow. So the bark is to be scraped of gently and can be done as follows. This is the stage at which unwanted cracks may be found as was the case in my first stave that then had to be discarded.
Removing the bark from the stave with a knife
The dimensions for a Mere Heath bow are as follows.

Mere Heath dimensions

Drawing on the dimensions of the bow
To remove excess wood stop cuts were put in place using a folding saw and then knocked out using a knife and baton technique.

Sawing stop cuts into the stave

Removing excess wood from the bow using a knife and baton
The side edges of the bow were then shaped and more excess wood removed with an axe and a knife to create the basic mere heath shape.

My bow after breakage was shortened and evened out to this shape
At this point however a crack had appeared in the edge of the bow and the bow was then altered to resemble more a holmeguard. Unfortunately after journeying, arriving home and floor tillering the bow to warm it off an end of the bow snapped off. Not having much luck with the Mere Heath or holmeguard style I then adopted a variation and a style more my own. I made a shorter bow that resembles a mere heath in miniature somewhat. The power behind the bow would not be so great for making the arrow travel long distances but would still have some power in it. I decided to keep going with this bow and the result would resemble an old stalking bow (bows that were used in stalking would not require as much ability to make the arrow travel far as the stalker would get within 30ft of the intended target)
The bow was therefore reshaped using a spoke shave to make this smaller styled bow once the bow began to bend it was then time to tiller.
Nocks were then put in so that string may be attached to the bow for tillering and as bow string later on

A spoke shave tool used in shaping the bow

Shaping the bow on a shaving horse
Part 3. Tillering the Bow.

Tillering the bow using a tillering jig
Tillering is an extremely important stage in making a bow it is really this stage that turns a piece of wood into a working bow and it is a stage in which much care must be taken.
I used a tillering jig to tiller my bow that are quite simple to make and this one attaches to a shaving horse.
First it is important to make sure that the bow is bending evenly on both limbs, if the bow is not bending evenly then parts will be weaker than other and this may cause a break or a twist and a number of problems. To make sure the bow is bending evenly it is attached to the tiller and lightly pulled so that it may be visible the areas not bending, these areas are then worked on lightly with either a cabinet scraper or a wood rasp as I used, care must be taken not to over work these areas or a hinge may occur. The thickness of the bow should be roughly even throughout.

Removing wood as required during tillering with a wood rasp
Once the bow is bending evenly it is then time to tiller to the desired draw length and weight. Due to the shortness of my bow the draw length was only going to be about 26 inches maximum and we managed to get the draw weight to 36 pounds. To do this the bow is lightly worked on until it may be pulled to the desired poundage/ length, tillering also allows the bow to get used to being pulled and should always be done gently at first to warm it up.
Here you can see the areas worked on with the rasp during tillering
Once the limbs are bending equally and enough wood is taken away to get the desired draw length then essentially the bow is done and ready to be finished and fitted with a string.
Part 4. Finishing the Bow
Now that the bow has been shaped as desired and the draw length as desired all that remains to be done is sand the bow to a nice smooth finish, oil it if desired (I recommend Danish oil) and fir the string the shoot.
To make a string I recommend using Dacron and it is made much in the same way as making cordage and is created as follows in the image.
I made the bowstring using the Flemish string technique and the bottom loop tied using the timber hitch. A Flemish bowstring is made of separate strands cut to length and made into two or more plies and the top loop is made by placing in the end of the plies with the main body of the strings using a rope twist method.
The general rule of thumb is that the amount of string used should be about 3 to 4 times the length of your bow. Once you have the right amount of string, the strings should be waxed so that they don’t unravel.
To form the top loop twist the strand clockwise and then cross it anticlockwise over the other and repeat until a corded length is created long enough to form the loop. Wax the loop as well. Lay in the strings so that the ends are slightly stronger.
To make the second string follow this technique except this time it can be trickier as the ends are broken but the technique applies, the ends are laid in to make it stronger and the strings are waxed. The knot that is then used is the timber hitch “bowyers hitch”
Serving string is then wrapped around the area in which the arrow will rest and the string pulled to protect it from wear and tear.
The string should be waxed regularly.

Tuesday, 1 June 2010
Art By Claire Watson
Recently I was very honoured to have been involved in a project and series that a good friend of mine, Claire Watson, has been creating through the magical medium of paint. The painting of myself is a wonderfull peice on its own entitled "Bold Blue". I really appreciate Claires art and this peice in particular I marvel at the paradoxical realism and abstract feel of the image. Looking upon it there is no doubt in my mind that it is me and in this regard it is realistic and the shapes very true to form, the colours and use of shadow however lend to the abstract feel of the image. I am amazed at this unique and paradoxical combination and find that it works wonderfully.

Claire who is a generally creative and artistic wizardess has tried her hand to great effect in many different forms of artistic expression from modelling to sketching to photography, amongst many others, and it is nice to see this self expression manifest itself in her painting work.
She is currently working on a series of nudes in this styling and when asked where she drew her inspiration from she told me that she first got the idea after doing a painting for her sisters birthday, who has been a fan of her sunrise and sunset silouhettes and "feeling blue", combing these two styles she came up with a new passionate image in red.
"I enjoyed doing that painting, so i thought about what else.... and I'm a big supporter of LGBT.... so instead of just sticking to female couples I also then started to do some male couples and then I thought of doing a series incorporating the colours of the rainbow, which is linked to LGBT pride."
"Not just LGBT but everyone! Every type of relationship, every strong feeling...its all part of life, the world and its all encompassed within the rainbow."
"Why do I like painting nudes? Because they interest me. Curves and the way light and shadows fall on them interest me"
All of this has combined to give birth to her new project where symbolism, a plethora of emotions, clever painting techniques, abstractism and realism combine to take us on a journey through all aspects of life, emotion and relationships, the world within the mind and heart and to create this beautifull Rainbow.
The "Rainbow" series along with more peices will be on Exhibition at Tea Tree Tea Cafe, Edinburgh in March 2011
Please do take the time to visit her site, this is not some publicity bumpf, I am not paid to write like this I am just genuinly passionate about her artwork and feel it is worth a look at the very least.
www.myartprofile.com/Lylium
www.redbubble.com/people/artCEW
Friday, 28 May 2010
Making Bark Containers

Bark has been employed throughout history for many different uses from sustenance and medicinal values to properties useful in craft.
Bark has been used throughout history for everything from Canoes to flasks and all containers in between. Bark containers can be made, with the right materials, waterproof and this combined with their lightness and decent durability make them a very worthwhile piece of equipment to have at hand for varying tasks.
It is also possible to make a bark container using no modern materials or tools, only what you find, employing flint for cutting and drilling and shells and stones for marking. For the benefit of this tutorial, however, I am going to show how to make a bark container using a knife.
The first most obvious step is to collect the bark for the container, it is important however that it is taken from the right species of tree, many species will not give there bark so freely.
The most obvious species of tree to use when making a bark bag or container is probably the birch tree (Betula sp.) but I have found that in this country the bark is much to thin to be of use and is prone to splitting at the lenticels making it fiddly business trying to get it off the tree. I have however seen some incredible pieces made from birch bark in Siberia where the bark grows thicker on the trees. If using birch however it is the outer bark that is used.
Species of trees that offer good bark are for example sweet chestnut (both the inner and outer bark may be used) as well as: Juniper, Aspen, Cherry, Willow, Cedars, Lime, Oak, Chestnut, Elm and a species which I am experimenting with at the moment is Rowan.
The other important factor when collecting bark is the time of year, it should generally be springtime (though I have heard of birch bark being collected in winter to gain a darker colour but this is difficult to do) and the bark should come from a living or very recently felled tree.
Once the tree has been selected it is important not to strip the tree completely of its bark nor take bark off in a complete ring round the tree, as this will kill the tree. I however only take my bark from trees that need to come down or recently felled as taking bark can damage or threaten a tree fairly significantly. I have also taken bark from limbs of trees before but this is generally thinner than from the main trunk, if doing so, I will take the entire limb and using it for other crafts.
The next step is to remove the bark. To do so mark the top and bottom of the section you wish to take with a knife or axe to give a clear guide. If cut through the bark to, but not into, the wood of the tree then this will help when removing the sheet of bark.
Then a line is drawn down the bark with a knife connecting the two markers. Work the knife slowly under the lip of the bark, between the wood and bark, down the length of the sheet until an edge is separated, depending on which type of bark is used it is sometimes then possible to work of the bark with fingers and wooden wedges.


Once the sheet has been removed completely from the wood it should then be made to lay flat to prevent it from curling which is what it will instantly wish to do.

The bark should be laid flat to prevent it from curling before use.
Next the pattern for folding the container should be marked out. It important when marking out the pattern that it be marked on the outside of the bark and done so with a knife or flint and not something such as a pencil as a pencil can actually raise the outer bark from the inner slightly and cause a bit of trouble.
Here we are making a simple folded bark container that will sit comfortably on the knee.
This is the shape which we must mark is as follows in the diagram.

If the bark is not folding along the score lines easily enough then score deeper but do not cut all the way through, we want the bark to bend not break!

Once the container is folded into shape it can be pegged to hold its shape and left to dry. At this point I then moved on to do some bark weaving to make a handle for the container.
To weave bark we must remove the outer bark first, this is best done whilst the bark is still attached to the wood and is easily removed with a blunt object like the back of a folding saw.

For weaving the inner bark must be cut into strips, the thinner the strips the more tight the weave may be. To cut the strips equally you could use strong scissors or a nice little trick using involving a knife in a stump and a peg for a guide as shown here:


An improvised grip for holding bark strips ready for weaving to make a handle
The pattern of the weave is important and is as follows. In the diagram below…

Follow the weave as above then when 4 is reached the 5th strip gets folded and the process started again in the opposite direction


When the weaving is complete the ends must be folded back in on themselves.
After a couple of hours the container should have dried out a little and is ready for stitching. To do so I used very thin strips of bark as the equivalent of the thread. When stitching it is important to make sure the holes or punctures are NOT in alignment vertically as this will encourage the bark to split, which is something that really should be avoided.
Stitch from the bottom up wrapping around the base of the container and finishing at the rim.
To help the bark keep its shape add a circle of wood in the top, here I used a piece of western red cedar bark that was already roughly bent to shape and secured it with further bark stitching.
This should complete the basic bark container, a handle may be added and designs if so wished.

The finished container and weaving
Friday, 30 April 2010
SPOONAGE!
SPOONAGING
(THE ART OF MAKING SPOONS)

Without doubt a rather useful utensil to have when out in the wilds and there is something very fulfilling about having made your own for use. A variety of styles can be mastered quite easily with few tools.
For making a spoon I tend to simply use my folding saw if harvesting the green wood myself, my trusty bushcrafting knife and, in this case, a crook knife (A knife with a curved blade made particularly for the purpose of carving out hollows and bowls.

The first step in making a spoon is to select your wood and harvest it green from the tree whilst doing minimal damage to the tree itself. Ideally wood used should be wood that is NON-TOXIC (avoid the likes of elder, yew and holly though there is some controversy over whether or not these woods may actually be used) as it will be in contact with food and mouth, ideally it should be wood that is quite easy to carve such as most fruiting tree woods or the likes of sycamore or birch (which initially has antibacterial properties) though you may wish to go for aesthetics (birch for example is a beautiful wood) or may have limited resource. Woods that are high in tannins are also good as they are more water-resistant and less prone to rotting. The wood you choose merely makes your job easier and I have managed to carve spoons from seasoned oak though it was very difficult to do so.
When collecting the wood you may wish to use wood from a recently felled tree or cut it from the tree itself, minimal damage to the tree is to me a more important goal than the perfect spoon. Some like to use a branch with a natural dogleg to incorporate the shape of the handle but you can quite easily make a spoon from a straight piece.
When taking wood from the tree we want to leave a clean cut that will not collect water and cause rot and we do not want to cut so far into the tree as to do it damage. So when we cut the tree we want to make three main cuts.
The first cut is made from the underside of the branch and we cut in until we feel the saw bite, it is wise to cut about a hands width from the tree in the first cut.
The second cut is made on the upper side about 2 inches towards the tree from the first cut. This method is called a step cut. At some point the wood will split between the two cuts creating a “step”
The third cut is to smooth of the severed limb at an angle to allow water to shed and the tree limb to heal.

Now we must cut the branch to a good-sized shape for a spoon, this will depend upon what sort of spoon you make, a mixing spoon or a teaspoon and everything in between is possible.

Once the wood is cut, roughly, to the desired size then it is to be split. The wood can be split with an axe or with a knife and baton. Safety is always important and should always be a priority when woodworking.

When splitting wood with a knife and baton always make sure the knife parallels your body so that if it passes through the wood unexpectedly it will not cut into your body.

Wood may also be split using an axe if confidant, always chop in a safe manner and be aware of where the axe is at all times
Assess the wood for damage, rot, grain pattern, knots and so on and choose which halve to make your spoon from. Some people like to draw out a spoon shape at this stage and it is a wise idea when starting out.

The meat of the wood then has to be removed and the spoon shaped knocked out and this can be done using stop cuts. Remove wood up to the bowl and along the handle.


The bowl shape of the spoon can then start to be carved into the rough shape and the back of the spoon reduced. Some people, myself included, may wish to do these steps with an axe though for safety sake it is probably worthwhile using a knife.
The spoon should roughly be shaped now and the bowl ready to be carved and this can be done using a crook knife.
BE VERY CAREFULL using a crook knife as they can cut quite nastily so generally always cut away from yourself as you should with any knife, I have heard nasty stories of crook knives imbedded in fingers.
Hopefully now having carved out the bowl of the spoon you have the desired shape and all that needs done now is to sand the spoon (I have found sandpaper made for electric sanders better than ordinary sheets as it is less prone to breaking up and tearing) as desired and possibly oil or use beeswax to finish the effect. You may wish to add some extra detailing.

If all else fails and the spoon is beyond saving then one can always improvise and turn such an item into a butter knife or at the minimum a toothpick or some nice firewood.

Subscribe to:
Posts (Atom)
